|
||
|
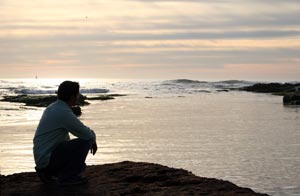
Rule of Thirds The most well-known rule of composition is the Rule of Thirds. It's an old rule of art that painters used even before photography was invented. Quite simply, it states that you should divide your frame into thirds in the horizontal and vertical directions and the main focus of your photo should be on one of these lines or where they intersect. See the following diagram (intersections are highlighted in blue):  By moving your subject away from the center of the frame, you can easily achieve a more interesting looking photo. Notice that by the slight difference in framing using the Rule of Thirds that the picture on the right is more interesting.   Summary: Don't put the interesting stuff in the center. Diagonals Another well known rule is draws from the fact that the eye is drawn to diagonal elements in a scene and tends to follow them from corner to corner. This is the basic guide:  Put interesting elements along the diagonals and see what it does for you. Here are some examples:   Summary: Picture diagonal lines across the frame and put stuff there. Leading Space For subjects in motion, remember to leave space in front of them to move into otherwise it just looks weird. Here's an example:  He looks like he's going to walk right out of the frame! On the other hand, the following picture has plenty of space in front of the runner.  Summary: Leave space in front of someone if they're moving. Foreground A lot of times it helps to add a foreground element into your pictures. By adding a foreground element, the viewer has a better idea of the overall scene that the subject is in. For example, if the following picture was just of the bench, it would be quite uninteresting. The leaves and trees work together with the bench to create an interesting scene.  Summary: Use a foreground element to help place the subject in its environment. Keep Your Horizons Level A lot of times people tend to get caught up in the moment of the photograph and forget attention to detail. This can be seen a lot of times in beach scenes: keep your horizons level! If you don't your photograph will look very odd! Now, if you're intentionally tilting it like a 45 degree angle to make it artistic, that's fine, but otherwise make sure you keep an eye on your horizon! For example, the picture on the left is tilted only 1 degree, but as you can see it completely destroys the look of the photo! The picture on the right is level.   Fortunately, horizons are an easy fix in post processing. If you have a program like Picasa, you can just hit the straighten button and move the slider until the horizon is straight. Easy as that! Summary: Keep an eye on your horizon! Like all rules, though, these are just rules. Rules are meant to be broken. Sometimes putting the object smack dab in the center of the frame can be dramatic, sometimes it can't. Here's one rule you should follow, though: Play around, experiment, see what works, see what doesn't. Photography is an art; although there are things that you can do to generally make most of your pictures better, at the end of the day, it's all up to you and your photographer's eye. |
||
Back to Main Digital camera help, tips on digital cameras, and camera techniques. Canon Powershot camera help and Nikon digital camera tips. Canon SLR and Canon camera tutorials. Nikon SLR, Panasonic, Casio, and Pentax digital camera technique. All content on these pages are Copyright 2007-2011 Yu Jiang Tham. No content from this website may be used or duplicated without express permission from the owner. Please email support@facethelight.com for more information. FaceTheLight.com is part of The Happywalrus Network - Get Free Stuff and Make Money! |