|
||
|
Before and After The main things to note in this before and after shot is the smoother skin while keeping the sharp details around the eyes and mouth as well as the better overall lighting of the image. 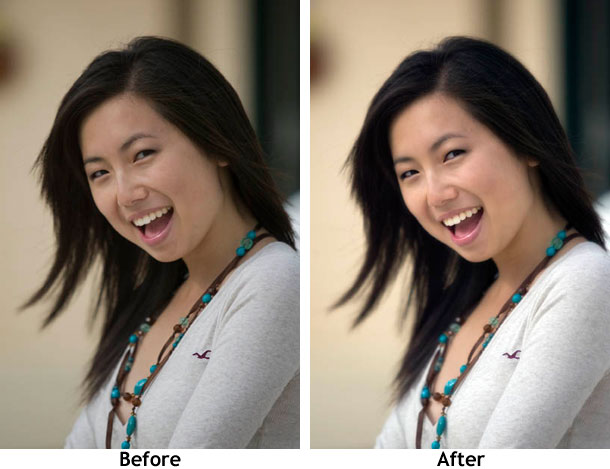 Step 1: Duplicate Background Make sure that the Layers panel is showing. If it is not showing, press F7. If something disappeared, press F7 again and it should come back. That is the Layers panel. If you are unfamiliar with layers, here is a quick explanation: The concept is layers can be thought of in a similar fashion to putting multiple transparencies on an overhead projector. Each transparency is a a layer and can contain different information. If you change the information in each layer, you won't affect the information in the other layers, but the overall look of what is projected on the wall will be changed. So if you know all of that already, you can start here. Right click on your Background layer and click Duplicate Layer. This will create a duplicate image on another layer above your background layer. 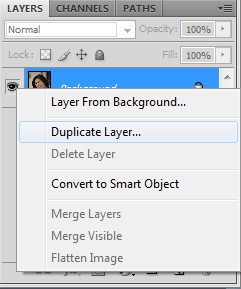 Step 2: High Pass Filter Now, go to Filter > Other > High Pass to apply a high pass filter onto the top layer that you just created. I usually stick to some number between 10-15 (I chose 12 this time). A higher number smooths out skin more, whereas a lower number has less of a smoothing effect. Be careful not to overdo it. It's easy to create someone with "plasticky" looking skin if the effect is overdone. 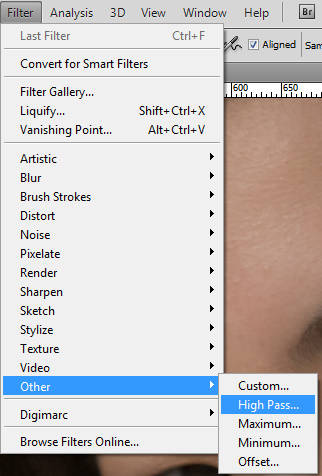 Step 3: Invert After you've applied your high pass filter to the top layer, press Ctrl + I to invert the layer. Step 4: Blending Mode Next, we're going to change the blending mode of the top layer to Soft Light. Changing the blending mode essentially changes the way Photoshop calculates how to display the output of the layers together based on the information in the layer that you just changed the blending mode in. Click the dropdown that says Normal in the Layers panel and select Soft Light. Now we see the image looks much smoother! 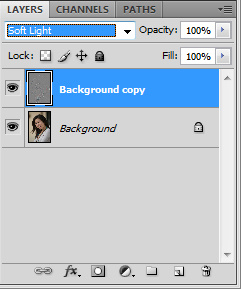 Step 5: Layer Mask Now we've smoothed out the skin, but we've also ended smoothing out the detail around the eyes and mouth. We can fix this easily by using a Layer Mask. The way the Layer Mask works is simple: it creates another greyscale layer that is attached to the current layer. Areas that are in white are opaque, while areas that are in black are transprent. Any grey inbetween is semi-transprent and varies depending on how dark or light it is. At the bottom of the Layers panel, click the icon that looks like a grey rectangle with a white circle inside it (make sure that the top layer is currently selected). You'll see a white layer 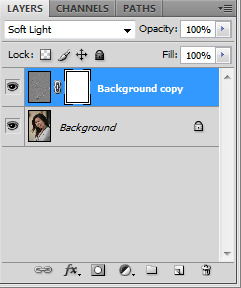 Step 6: Brush Brush Brush So now we need to paint black in the layer mask of the eyes and mouth of the subject in order to remove the effects of the high pass filter in those areas only. Select the Brush tool. 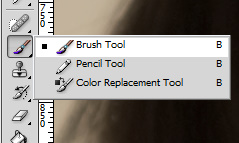 Next, select the foreground color as black in the tools panel. 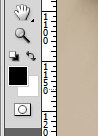 Then, change the brush options so that the hardness is set to 0% and the opacity and flow are 100%. The brush size will vary, but choose something that is a little smaller than the eyes. You can use the [ and ] keys to modify the brush size. 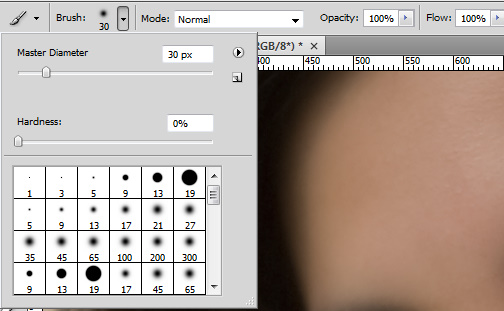 Now, make sure that the layer mask is selected in the Layers panel. Brush in the eyes, lips, teeth, and any areas you want the detail back. As you are brushing, you should see the edges come back to the eyes. 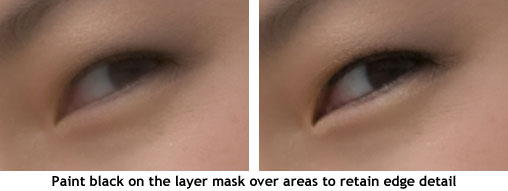 Step 7: Flatten the Image Next, we are going to merge the layers together by going to Layer > Flatten Image. This finalizes all of the layers by merging them into one. From here, we can apply universal tone and contrast changes. Step 8: Auto Tone Finally, we can fix the tones in the image by going to Image > Auto Tone. 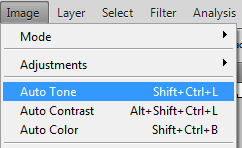 Voila! All done! Here again is the before and after: |
||
Back to Main Digital camera help, tips on digital cameras, and camera techniques. Canon Powershot camera help and Nikon digital camera tips. Canon SLR and Canon camera tutorials. Nikon SLR, Panasonic, Casio, and Pentax digital camera technique. All content on these pages are Copyright 2007-2011 Yu Jiang Tham. No content from this website may be used or duplicated without express permission from the owner. Please email support@facethelight.com for more information. FaceTheLight.com is part of The Happywalrus Network - Get Free Stuff and Make Money! |